
Patient Check-Out
This article describes how to check a patient out and process their payment from the check out screen.
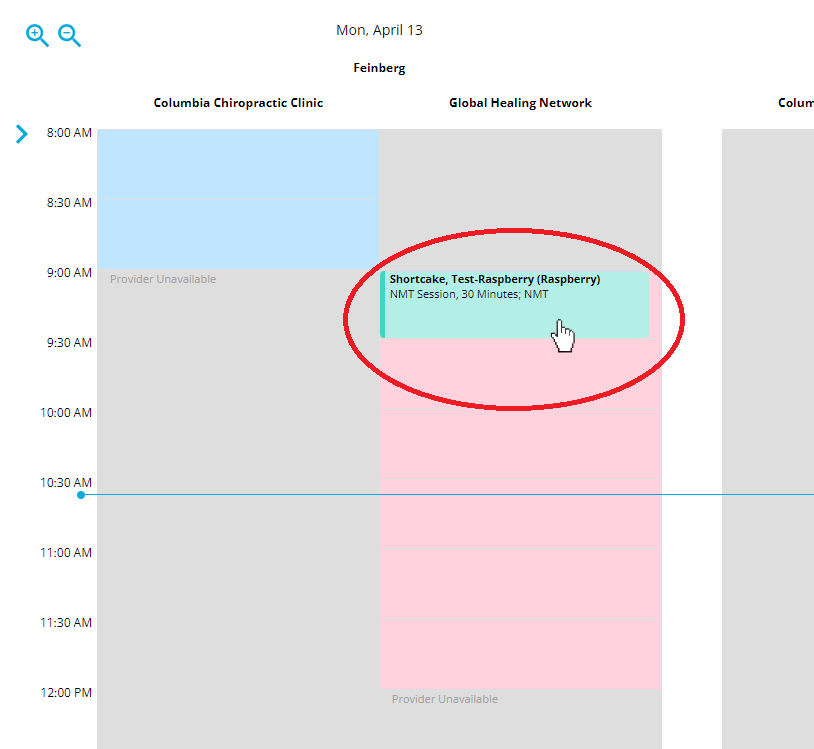
1. Navigate to Scheduling.
2. Go to the Calendar tab and view the weekly schedule.
3. Click on the patient appointment that needs to be checked out.
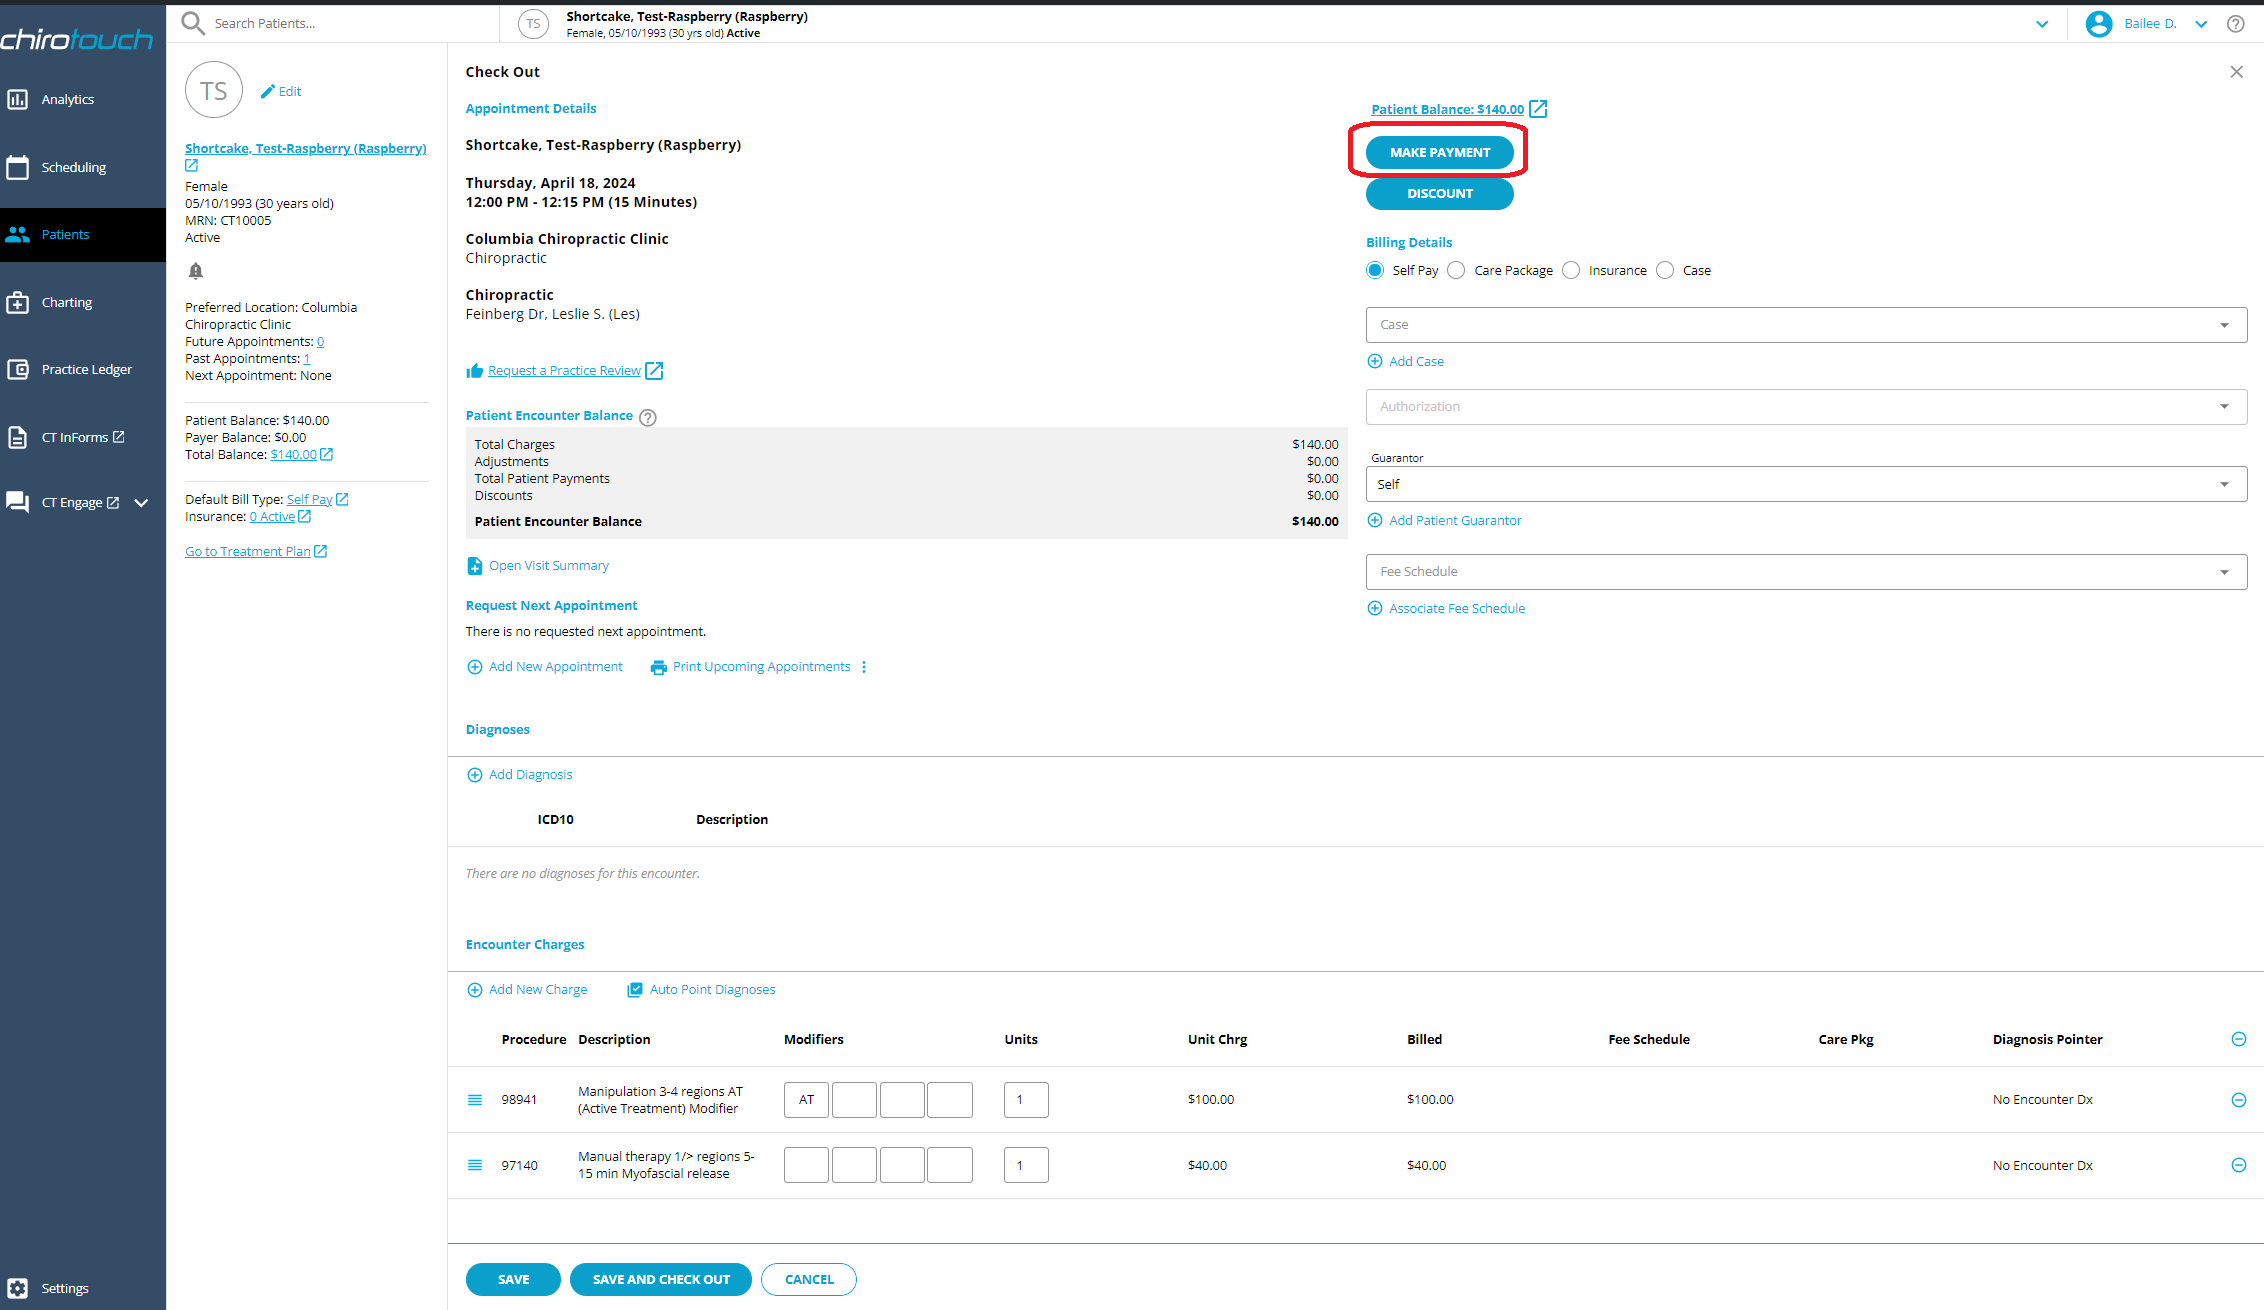
4. Click "Check Out"

5. Ensure patient charges are correct. The diagnosis code and the patient total need to accurately reflect the services rendered. If there are no charges learn how to add them *HERE*
6. Make sure that the patient Billing Details are correct. If they have insurance make sure to select "Insurance", if they do not make sure to select "Self Pay." You can learn about patient billing details *here*

7. Once you have ensured that the Billing Details are correct, click the "Make Payment" button if the patient needs to make a payment at the time of service
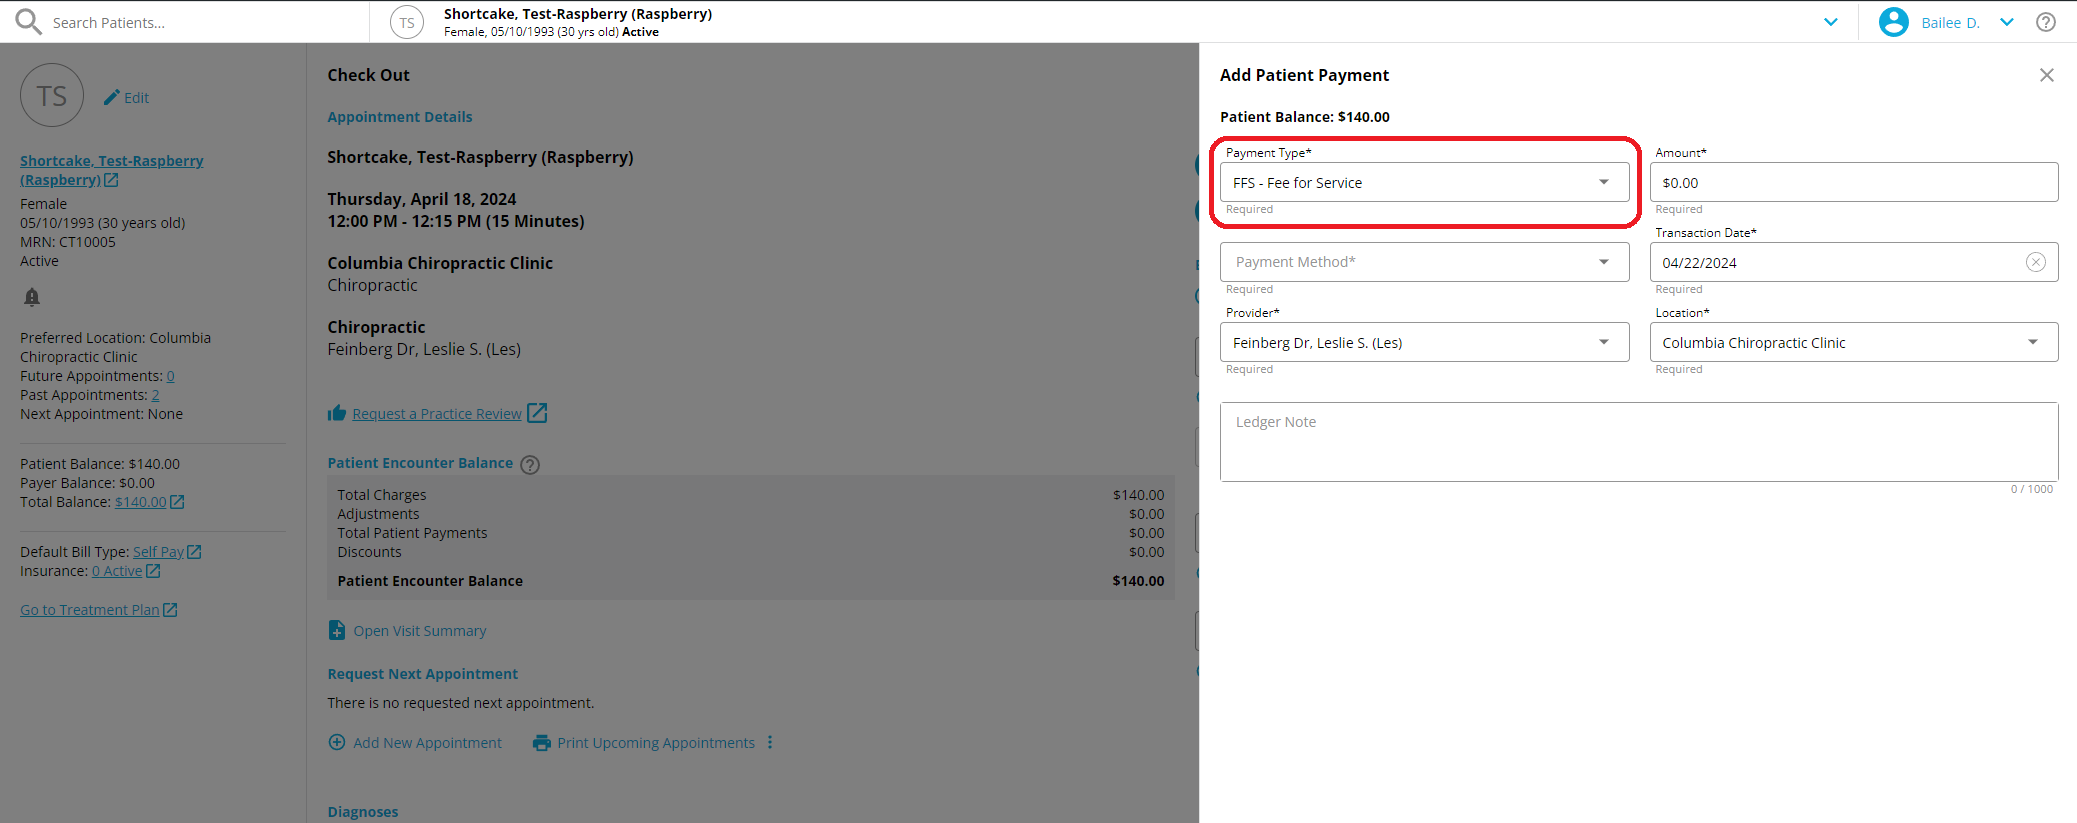
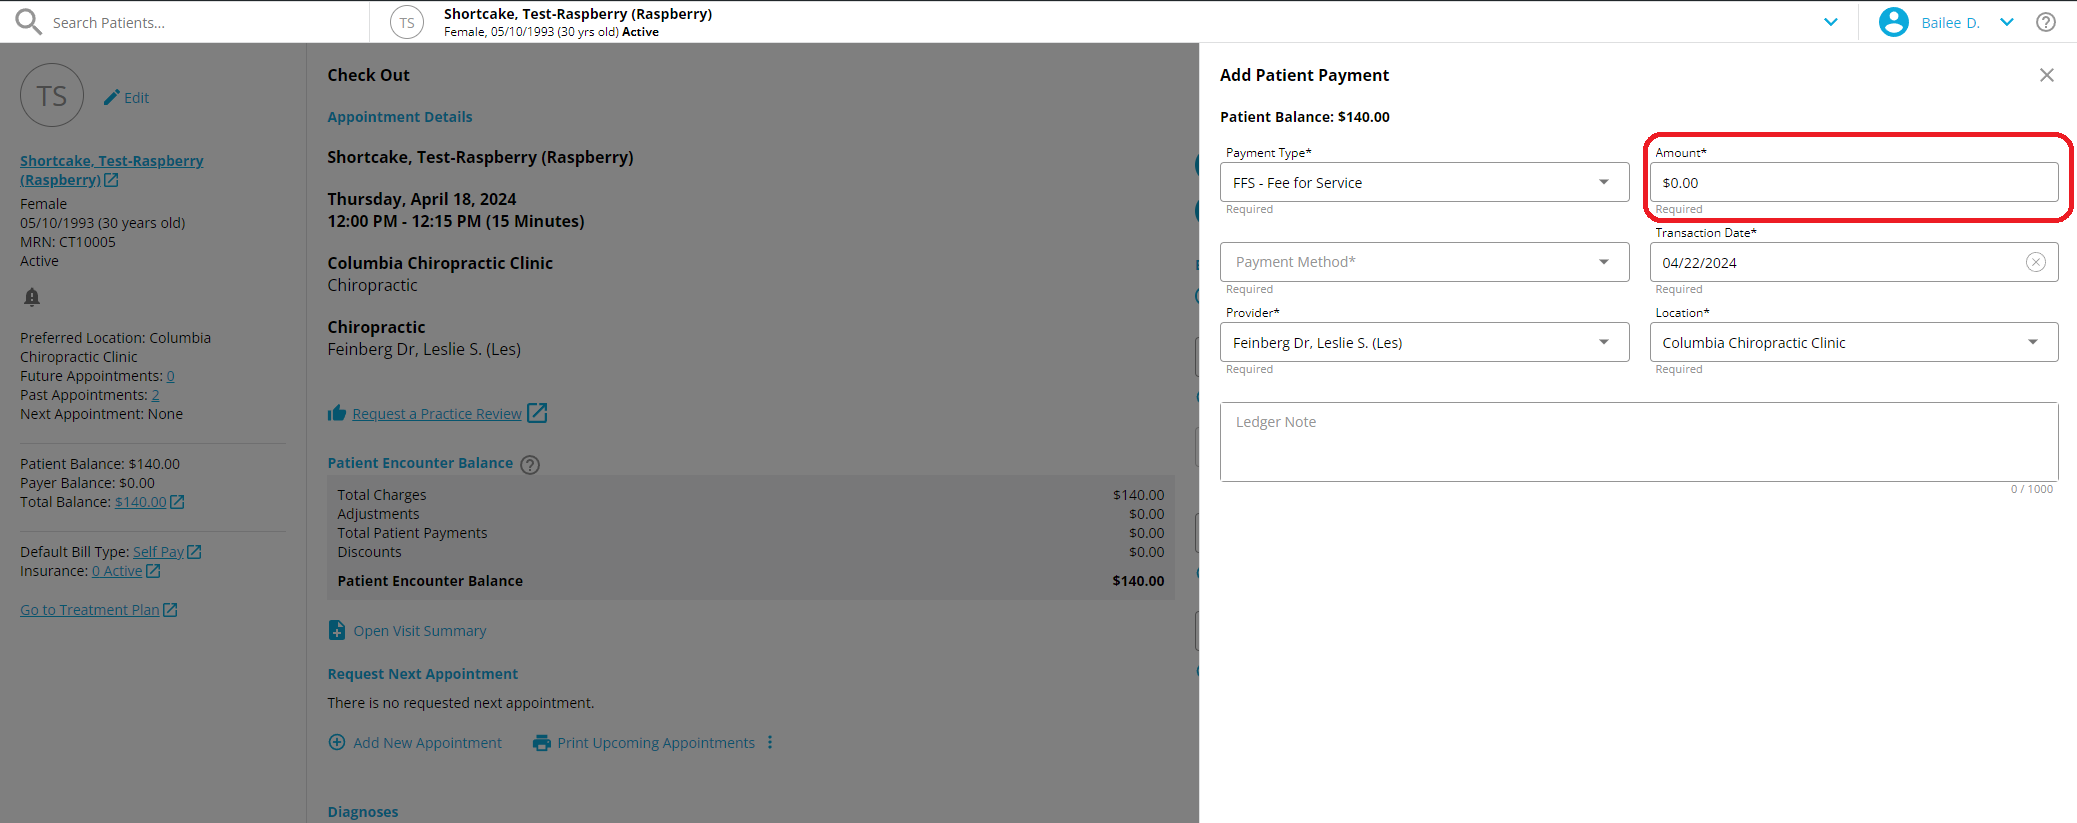
This opens the "Add Patient Payment" page. Fill out the Payment Type, Amount and Payment Method. Learn more about the Patient Payment screen *here*
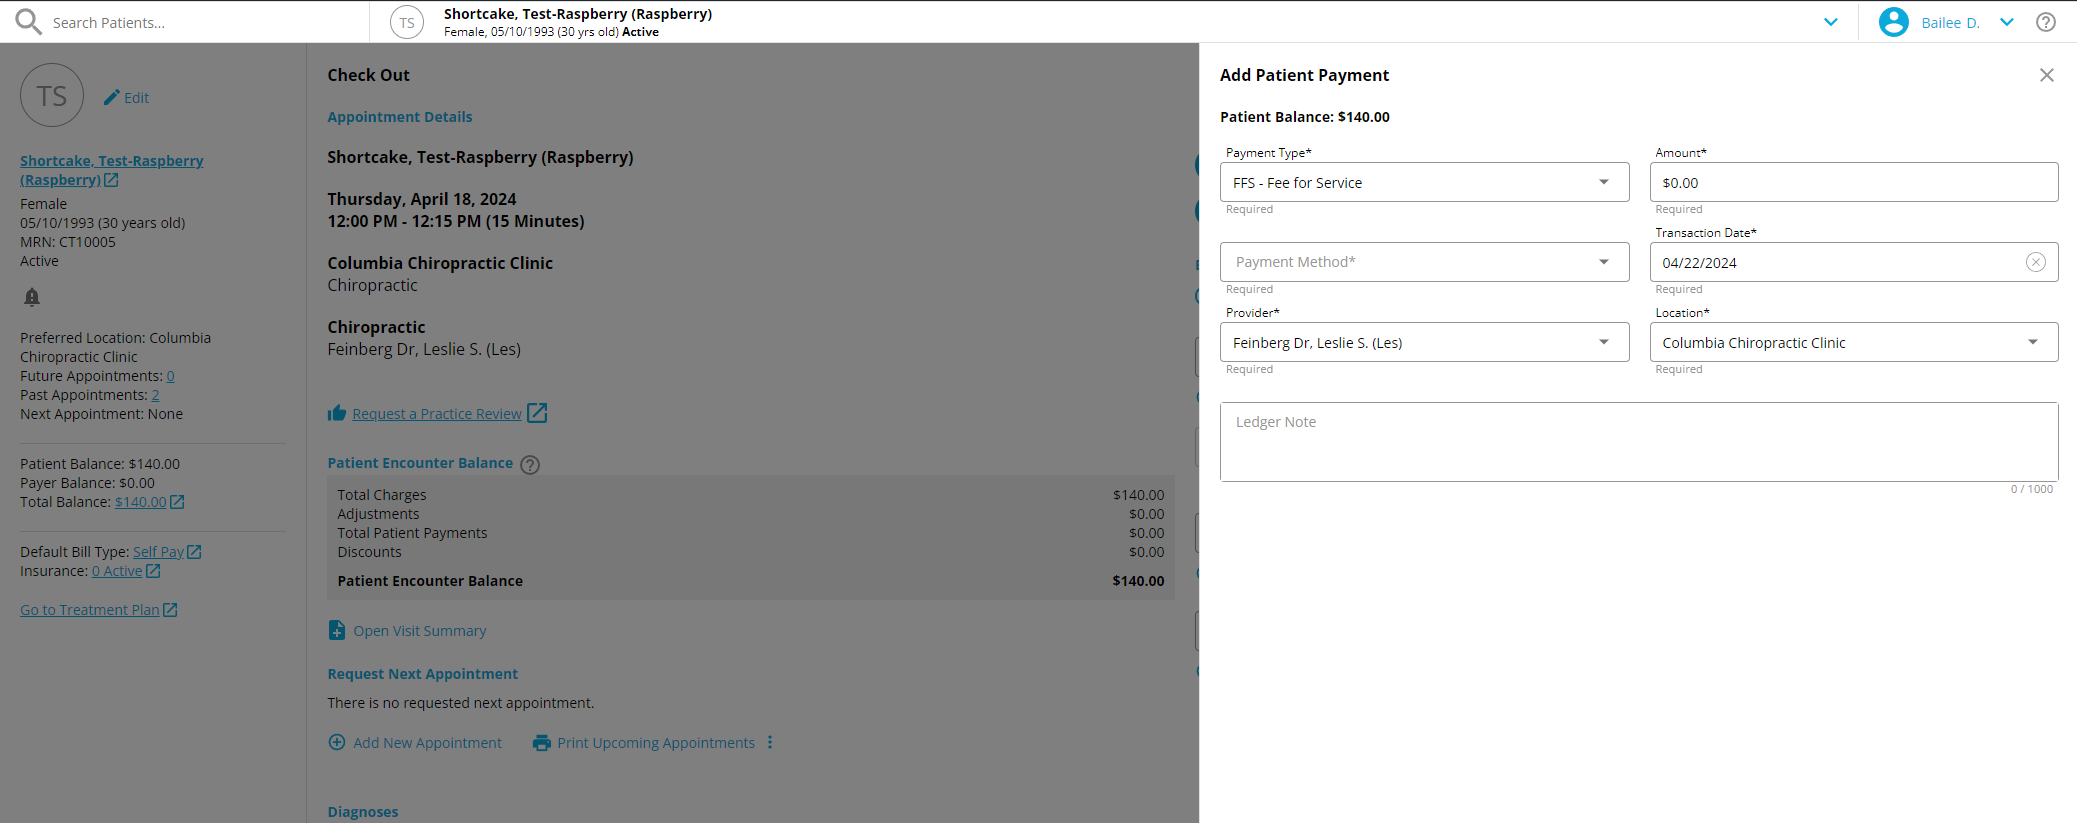
8. Select the payment type. Most transactions should be labeled as "FFS - Fee for Service" or for the Medicare non-covered charges of $20.00 "PR - 96 - Non-covered charges."
9. Now enter the payment amount.
10. Select he Payment Method. We accept cash, check or credit/debit card. Clicking into each payment method will show options for each.